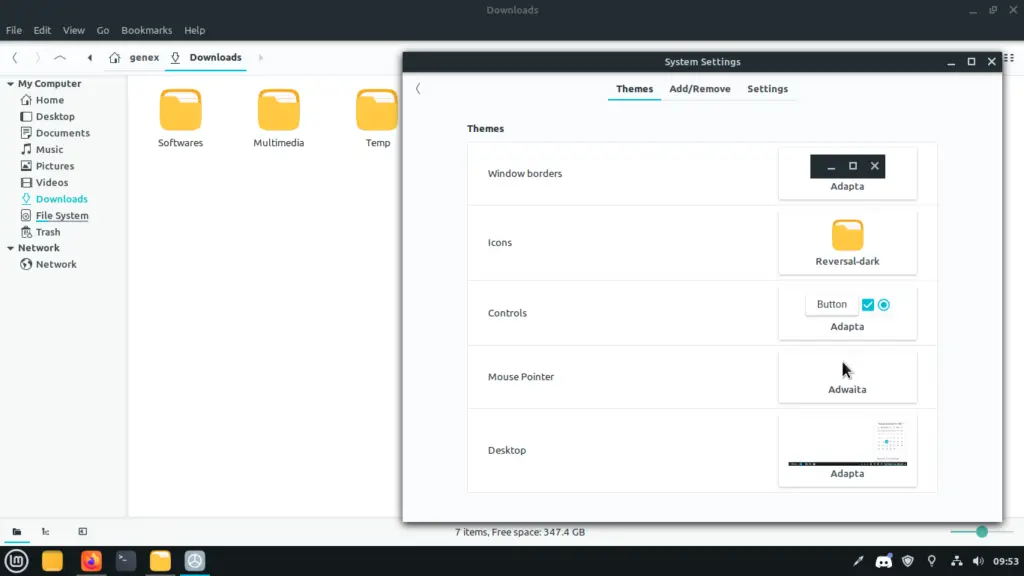
Linux comes with a great set of customization tools. You can customize almost everything on Linux.
From the look of the windows to the look of the terminal, everything can be changed. You can use extensions, applets, and various other scripts to customize linux.
There are 10s of pre-installed themes and icon sets. You can also download new themes and icon packs from the internet to customize your device according to your need.
Most of all, you can change the whole desktop environment. Various desktop environments like KDE, Xfce, Mate, Unity and Cinnamon are available to choose from.
You can install over one desktop environment on a device. For example, Linux mint does not come with KDE. However, it can be installed with just a few commands in the Terminal.
Introduction
Customization features in Linux works out of the box and hence in terms of customization and beauty Linux can outrun any other operating system.
In a survey I conducted on r/linuxmint I found that a lot of users switched to Linux from Mac or Windows just because they have full control over their system, including looks.
Also Read: How to dual boot Phoenix OS with Linux mint?
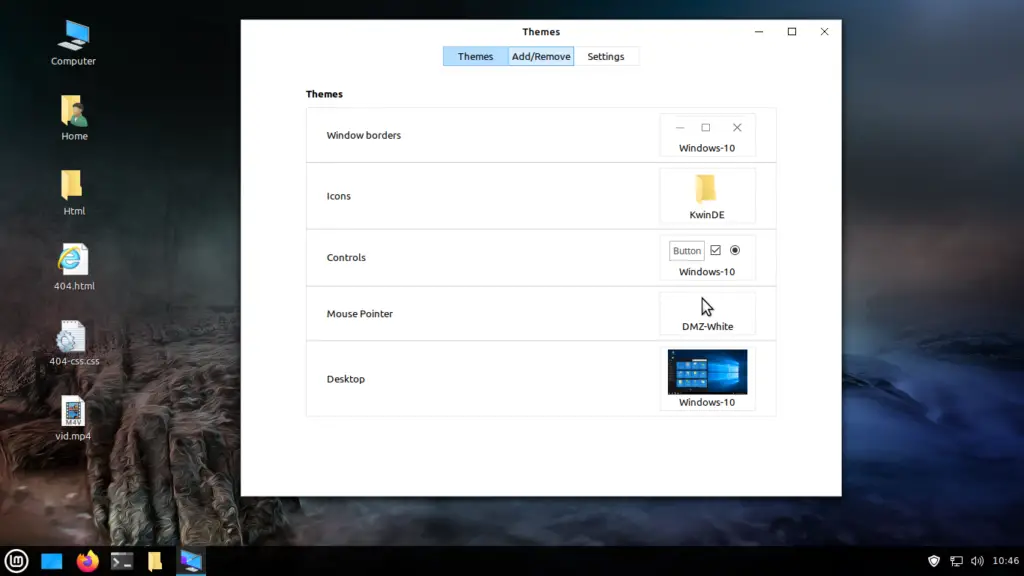
The best thing is that you can even make linux look like Mac or Windows in steps a few easy steps.
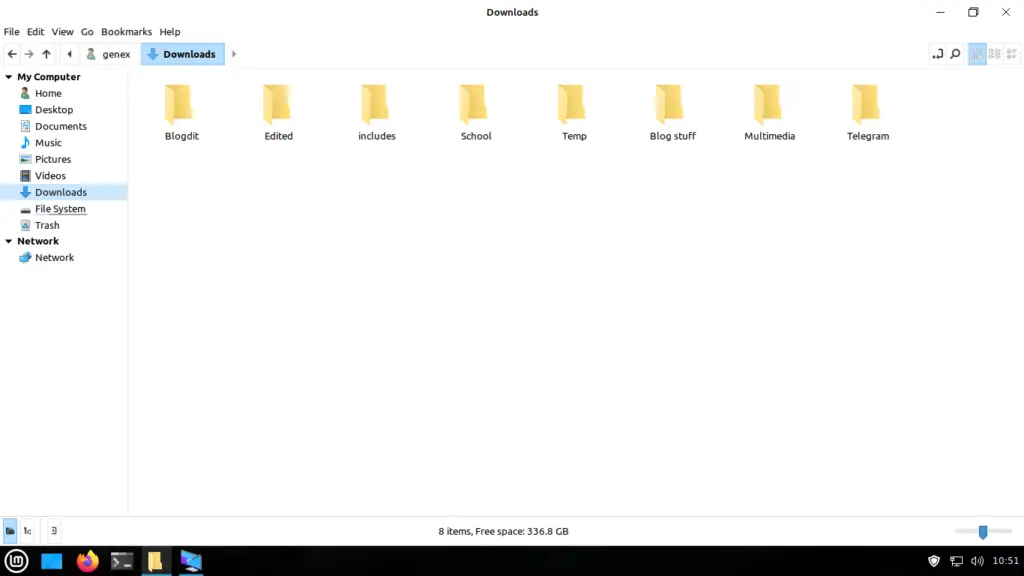
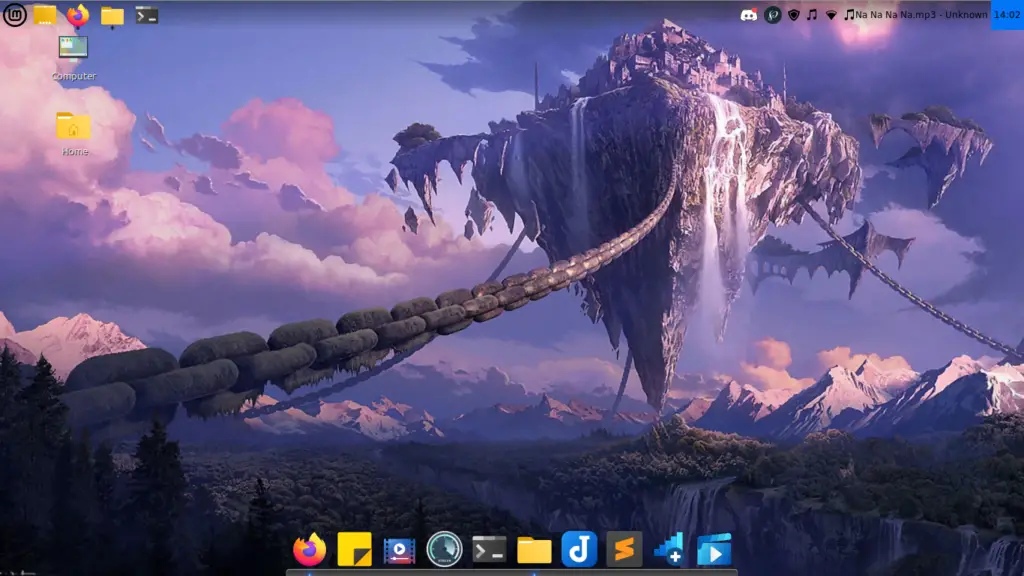
All the images that you see below are of the same one desktop but configured differently.
Till now we have been talking about how we can customize the Linux desktop? but what about the Linux terminal?
Note: I am on Linux mint and is using Gnome-Terminal.
Well, the good news is you can customize the terminal as well. From changing the background colour to making it transparent or changing the text that appears before every command, everything is customizable.
Also Read: Best blue light filter for Linux – Gammy
So now let’s customize Linux terminal.
Customize Linux Terminal
Launch the terminal to start customizing it and go to Edit >> Preferences
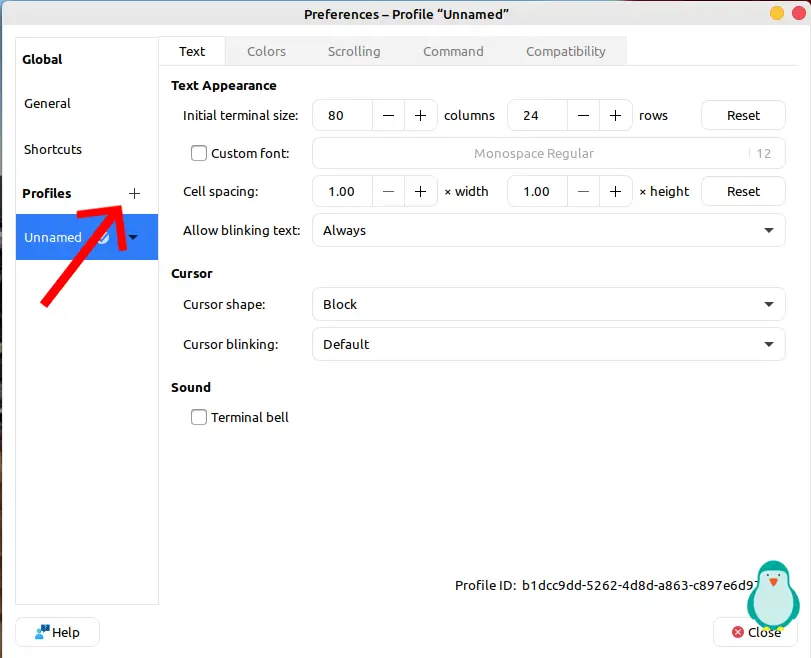
Start by creating a new profile for our fresh look so we don’t mess up with our default look. This will help in case you want to revert everything to default.
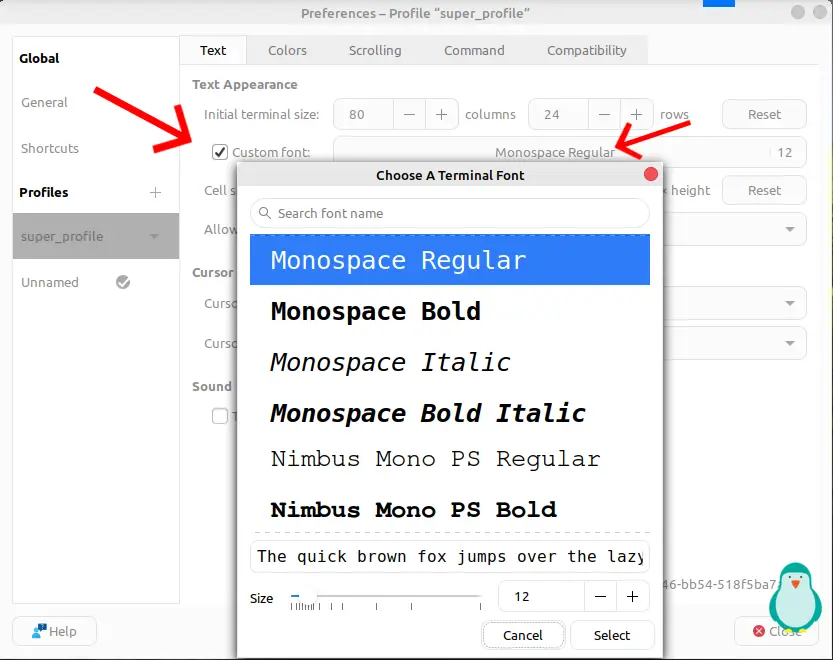
I am going to choose a different font than default for my terminal. You can do so by checking custom font >> Monospace Regular.
Also Read: How to create a Linux live USB (With Pictures)?
My default font is Monospace so for you it could be anything. Just check the custom font box and select a good font that you would like to use.
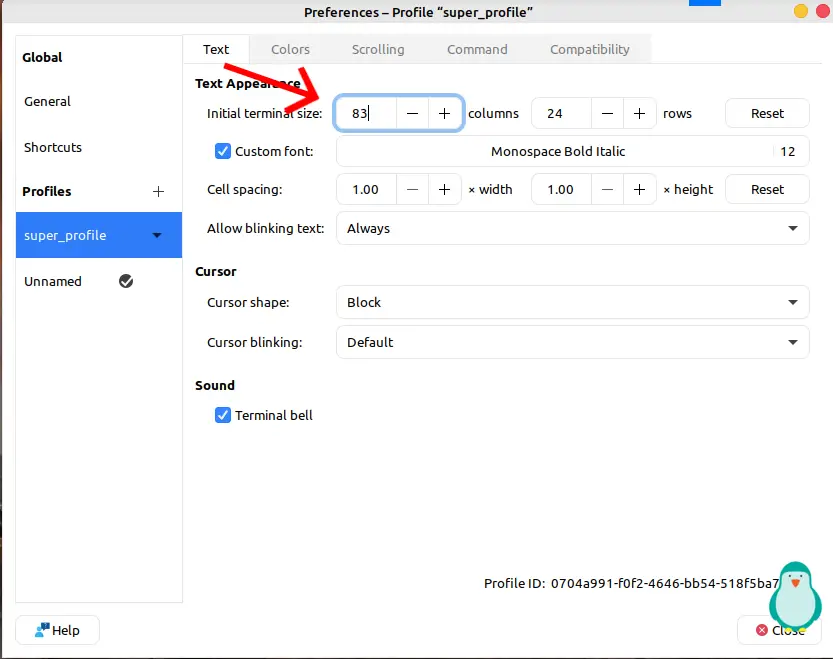
If you don’t like the default size of the terminal, then you can also change this. If things go wrong, then press the Reset button to reset the size of the terminal to the default size.
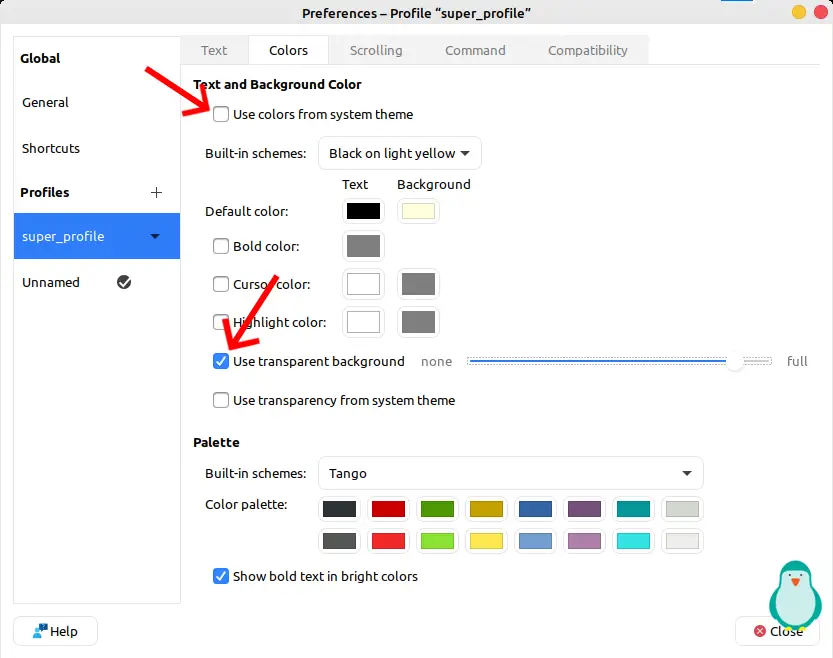
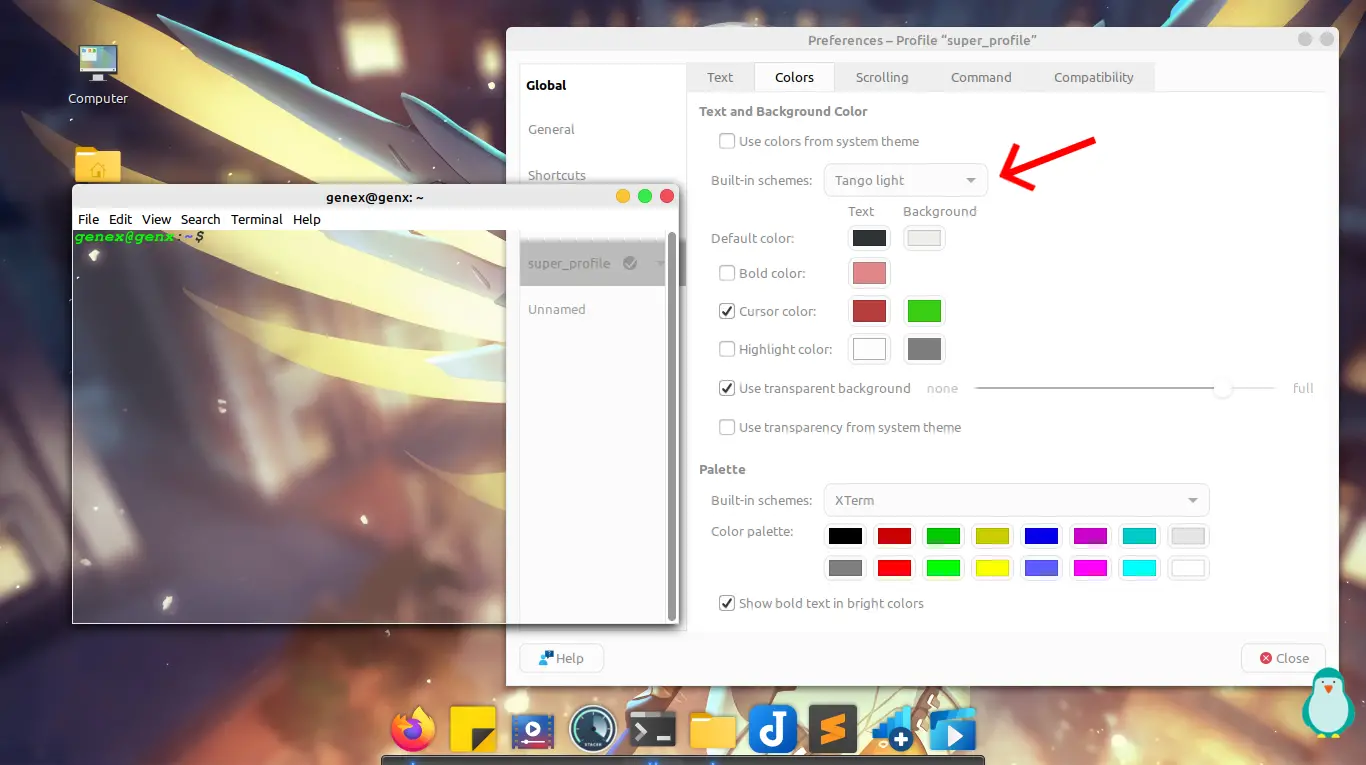
I am going to make the terminal transparent for this I have unchecked the box that says “Use colors from system theme” and check the box that says Use transparent background.
Don’t make your terminal completely transparent as you won’t be able to read the text on it later.
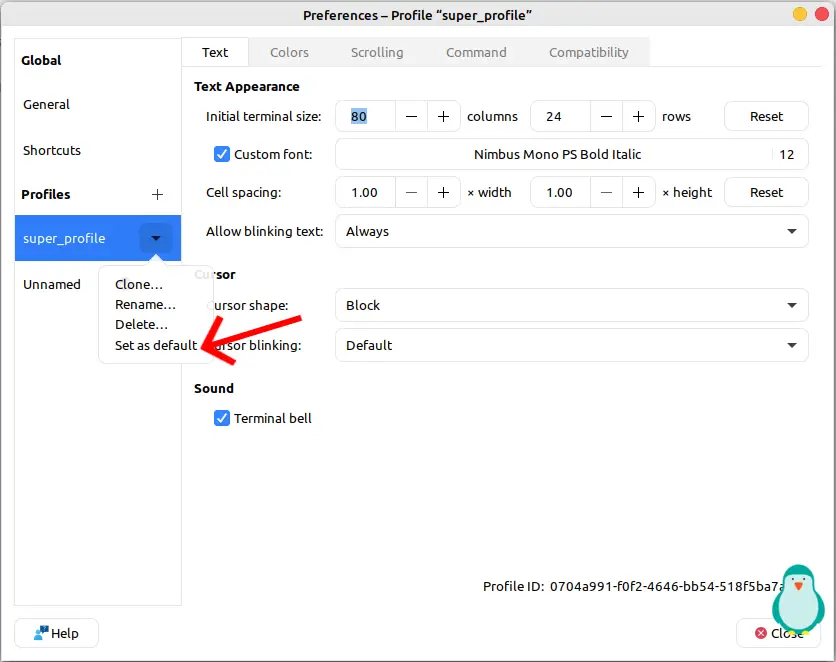
Do not forget to click on the drop-down under Profiles and make the profile that we made earlier as default.
Also Read: How to Install Godot in Ubuntu and Linux Mint 20
If you don’t set the profile that you are working on as default then your terminal won’t update and the look will stay same.
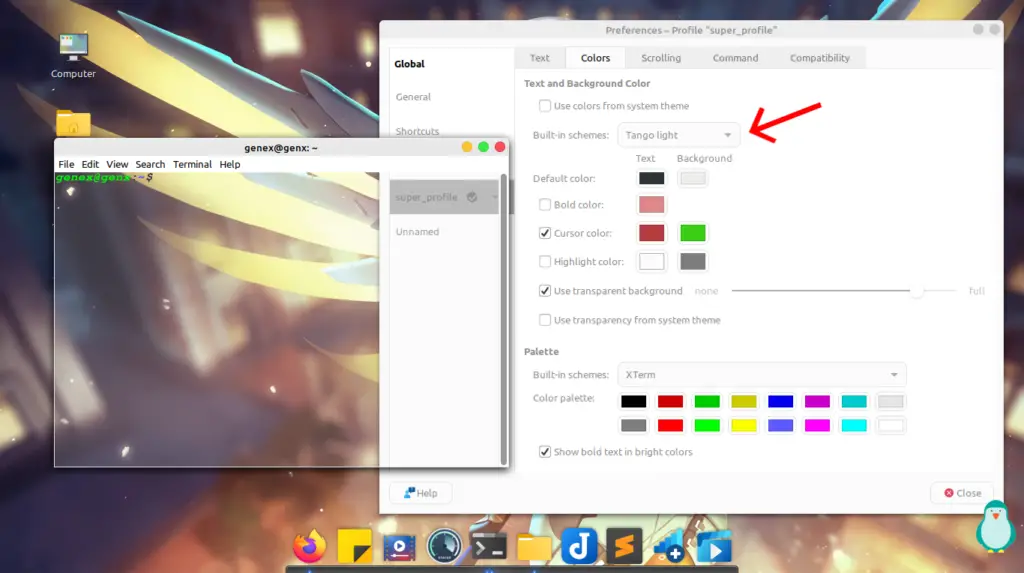
This is what my terminal looks like so far. You can also try using the color pallets at the bottom or you can use the Built in schemes. I am using the Tango light scheme.
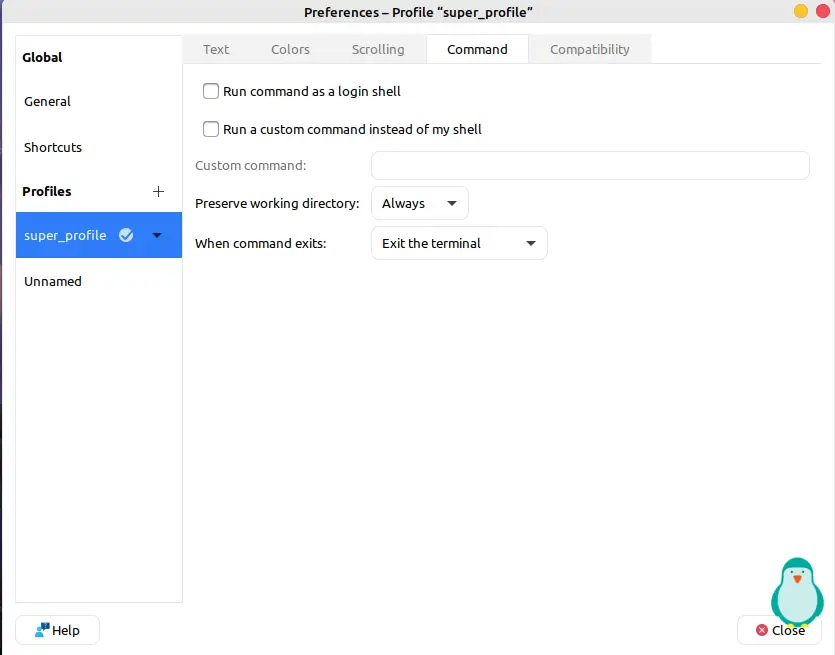
You can change some important settings in the Command and Compatibility menu these settings won’t affect the look of our terminal.
Also Read: How to Install Google Chrome on Linux Mint 20
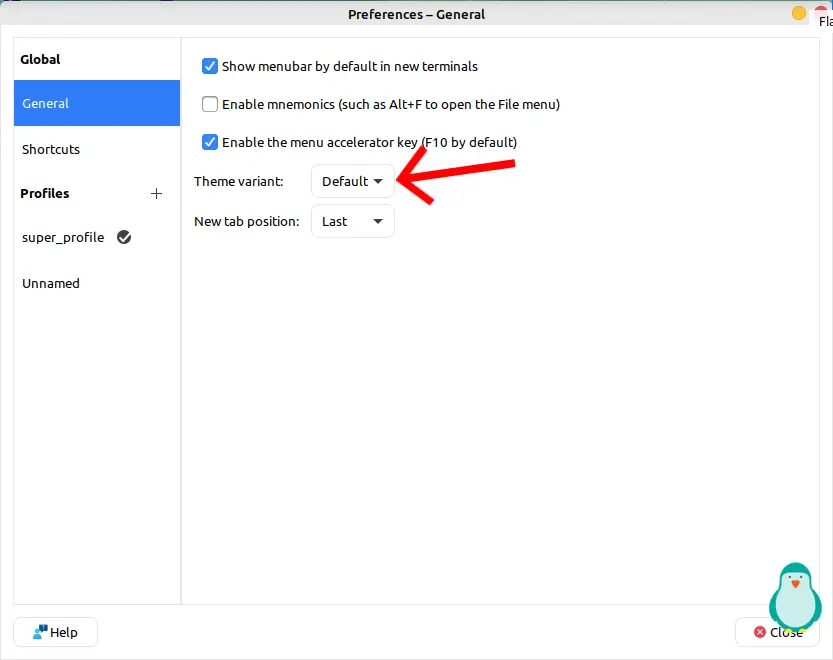
In the General tab you can choose the Theme of your terminal. Either Light or dark, I have chosen to use the default theme which is the Light theme for me.
You can also enable some accessibility options from here.
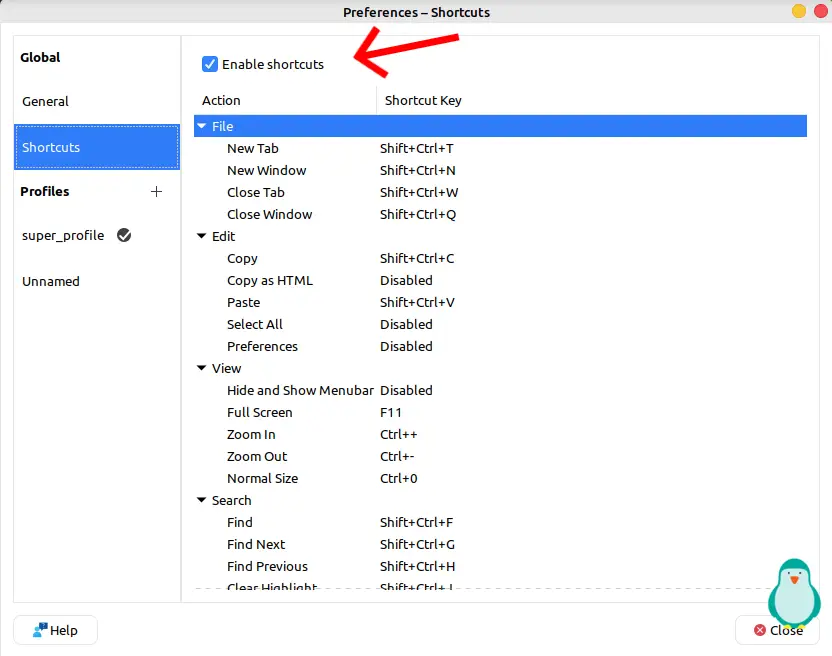
In the Shortcuts tab you can enable or disable shortcuts for your terminal. You can also create custom shortcuts or can change the existing ones.
Also Read: How to install Steam on Linux mint 20
Shortcuts are really helpful while dealing with such stuff, you may want to configure some of these.
Change the default Terminal text
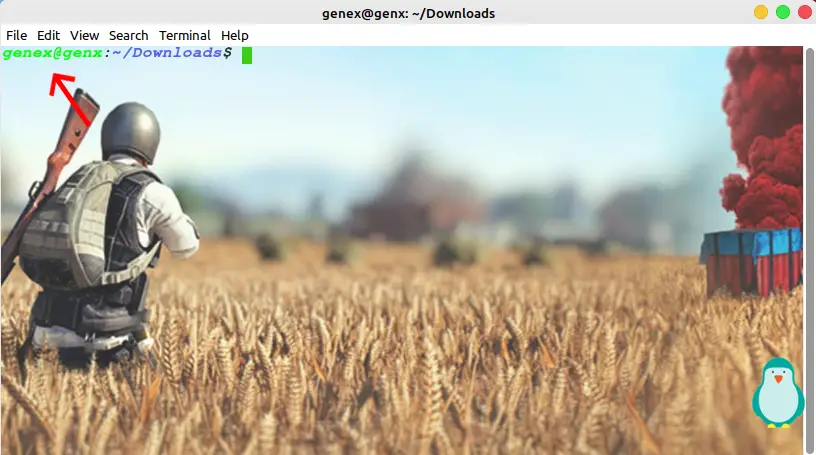
Now we will change the default text that appears in the terminal. I have pointed an arrow to the text that we are going to change in the picture above.
This is called the prompt to change this we are going to use a tool called as Bash Prompt Generator.
It is an open source script, available on github pages for free use.
Also Read: How to install Wine on Linux Mint 20
Visit this link to open Bash Prompt Generator.
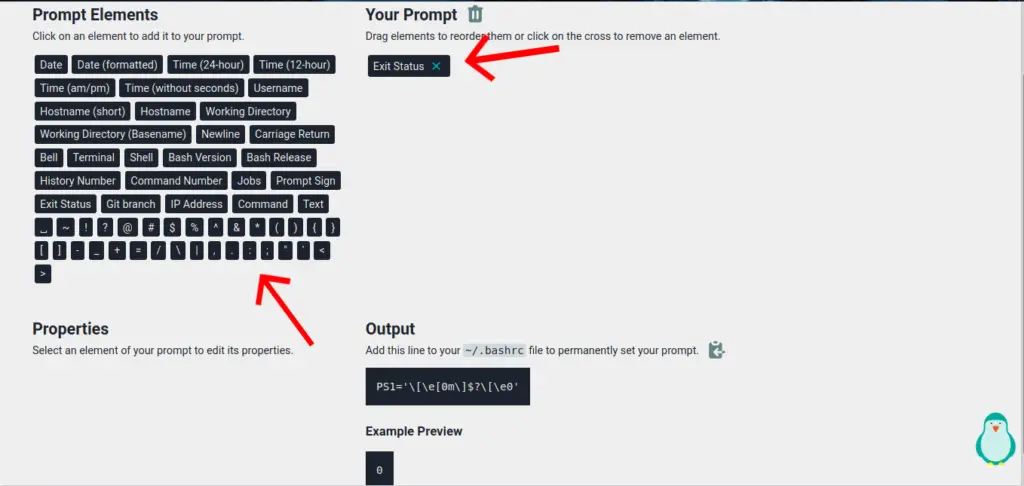
You can pick elements from Prompt Elements, and can put them under Your Prompt tab.
There are more than 50 elements available for us to choose from. We will add these to the Terminal in later step, right now let’s first choose the elements that we want to use.
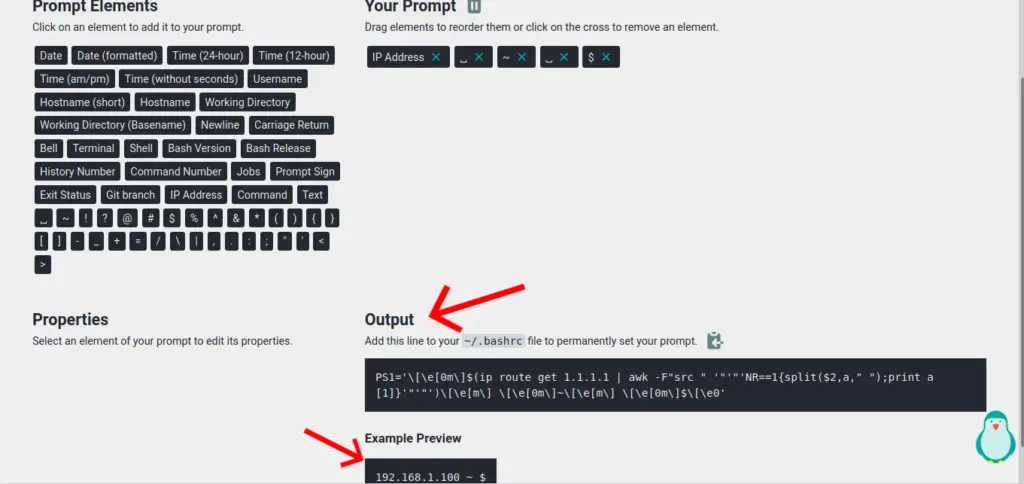
We will need to edit .bashrc file and need to put the code shown under Output in it.
You can also live preview how your terminal is going to look like with this under the Preview section.
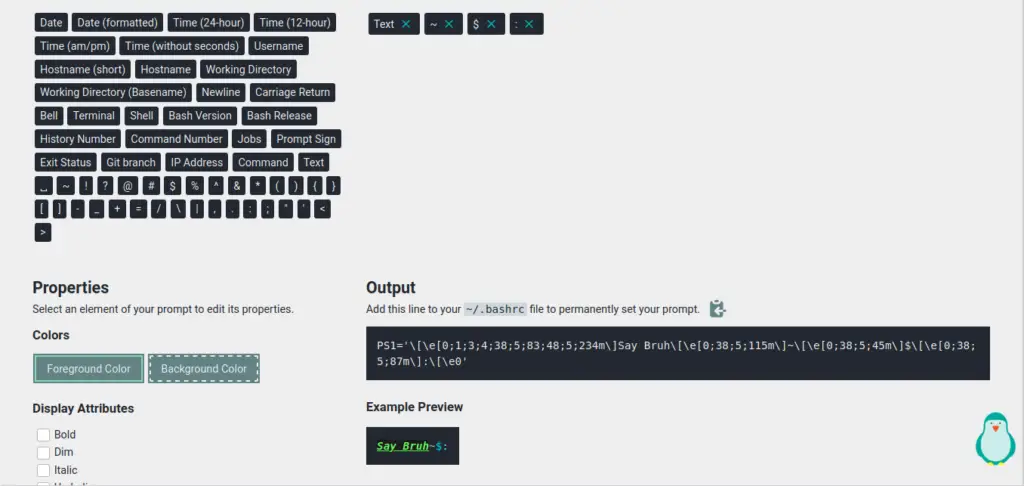
This is what I have chosen my terminal to look like. That’s a bit stupid, but you can be more creative.
Also Read: Install Simple screen recorder on Linux
You can define the properties of each element by clicking on it and customizing them in the Properties panel. I have changed the colour of my text under Properties >> Foreground Color.
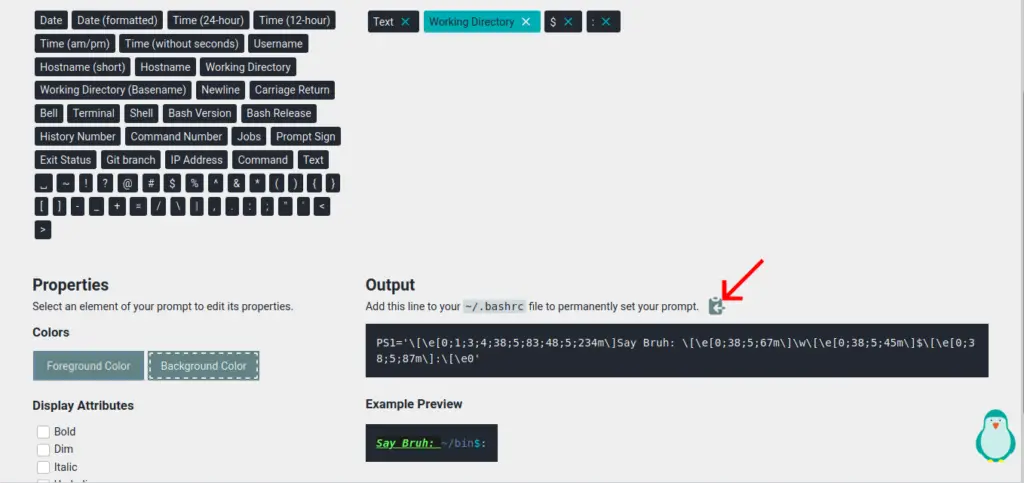
Once you are done customizing, it’s time to finalize things. So copy this code by clicking on the copy icon.
Editing Bashrc to complete changes
Enter this command to open and edit .bashrc file directly using terminal and scroll down to the bottom of the file.
nano .bashrc
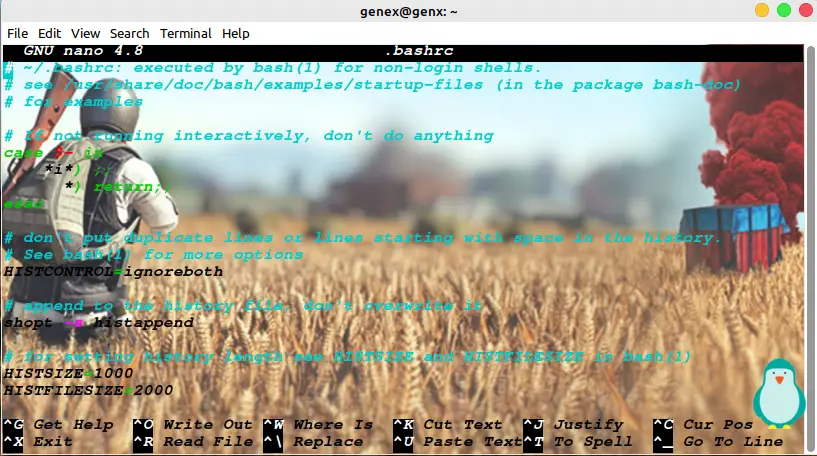
Now scroll down to the bottom of the file and paste the code that you had copied in the previous step.
Also Read: Add applications to cinnamon menu in Linux Mint
Remember Ctrl + C won’t work so you will have to paste using Right click >> Paste.
Now press Ctrl + X to exit, it will ask you if you want to save the file enter Y and press Enter key to save the file.
Now close and reopen the terminal to see changes.
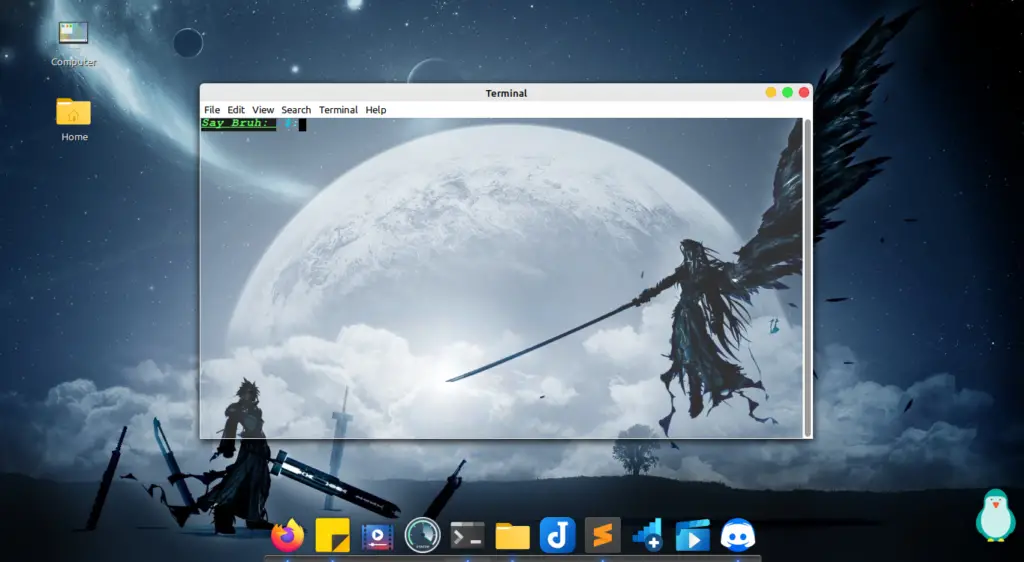
This is what my terminal looks like, to customize buttons and the look of the window you need to customize your theme settings.
Also Read: How to Install Tor on Linux Mint 20 and Ubuntu 20.04
You can also edit Bashrc file using any text editor. Just go to your home directory and enable Show hidden files, then find and edit .bashrc
How to revert the changes?
If you want to revert the changes, then follow the steps below.
- Go to Terminal settings
- Make the other profile that we had left without changes as the default changes.
- Go to your home directory or type nano .bashrc in the terminal and remove the line that we added using the same way that we used to add it.
This will revert to all the changes we did earlier. Share your terminal picture with us in the comments.
