
In this tutorial we will create a linux live usb in few easy steps. This tutorial will cover making live usb for in both Windows and Linux.
I assume that you have already downloaded ISO file of your preferred operating system for the following steps. If not, then consider downloading Ubuntu or Linux mint as they are beginner friendly.
Also Read: How to Install Godot in Ubuntu and Linux Mint 20
You can create a live USB if you want to install an operating system or just want to try it out, in our case it’s Linux.
Most of the operating systems are installed by creating a live/bootable usb drive which contains the operating system’s installation files, including Windows and many Linux distributions.
For this you will need an usb drive with at least 4 G.B space, 8 G.B. is recommended.
If the operating system allows then you can try it without installing the OS first. This is by far the best feature of Linux distributions.
Make Linux live USB using Etcher in Windows and Mac
Balena Etcher is a multi-platform software to flash OS image files in USB drives easily.
Also read: How to install Wine on Linux Mint 20
It is easy to use and freely available on Linux, Mac and Windows. You can download it from here. Download and install the one that is compatible with your current operating system.
Before you proceed making a live USB i warn you that whatever your data on the USB drive will be wiped out during the process.
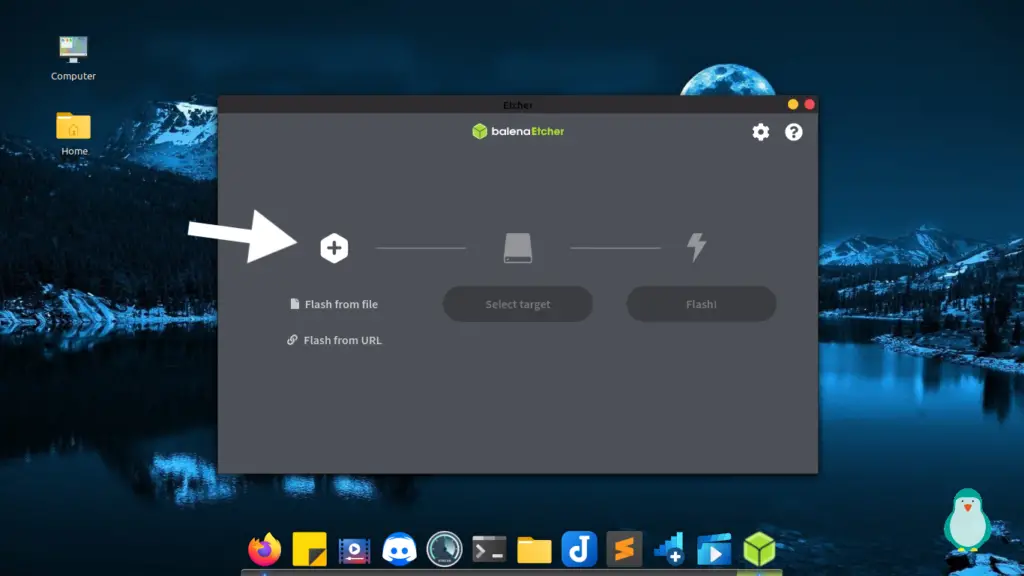
Step-1: Open Etcher and select Flash from file option and choose the ISO file of the operating system that you downloaded earlier. .
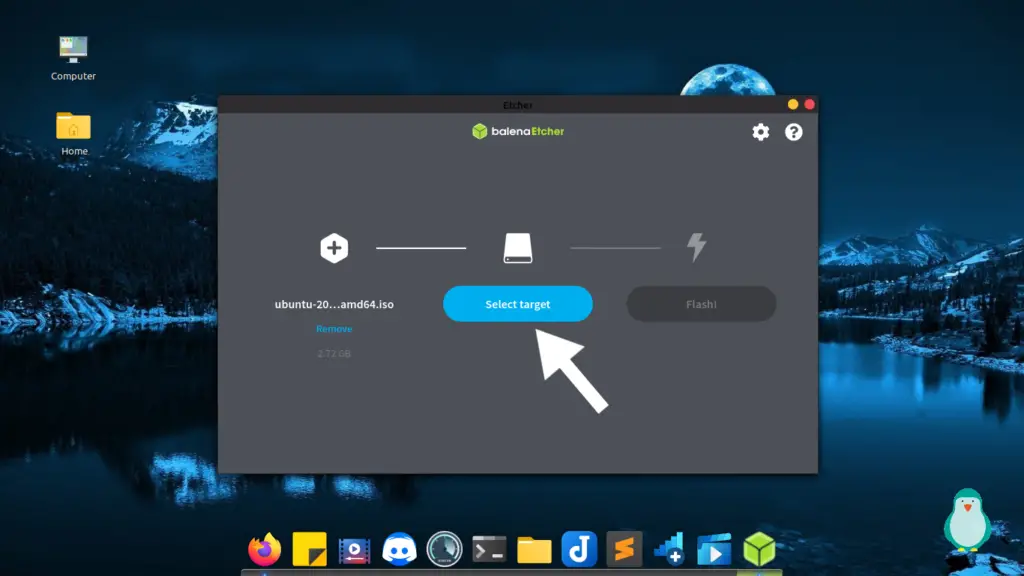
Step-2: Click on Select target button to choose a drive for flashing our ISO image
Also Read: How to install VirtualBox on Linux mint 20
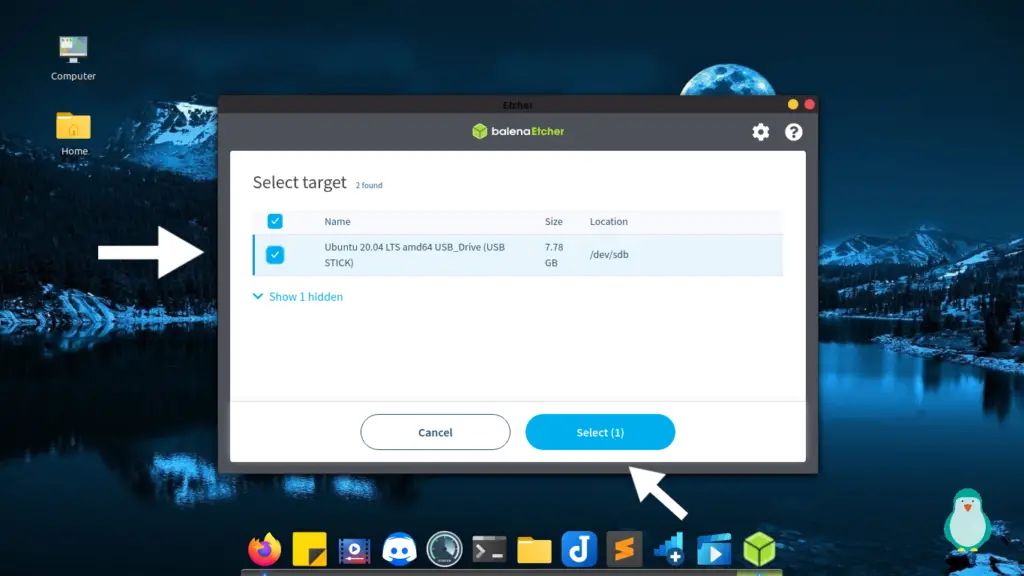
Step-3: Choose the USB drive that you want to flash the image on.
NOTE: I am using a 8 G.B. USB drive and Ubuntu 20.04 is just it’s just shown as its name(in the picture above)

Step-4: Now click on Flash to flash the image on the USB drive. This will ask you for administrative access to give it the required permissions by clicking Allow.
Also Read: How to Install Google Chrome on Linux Mint 20
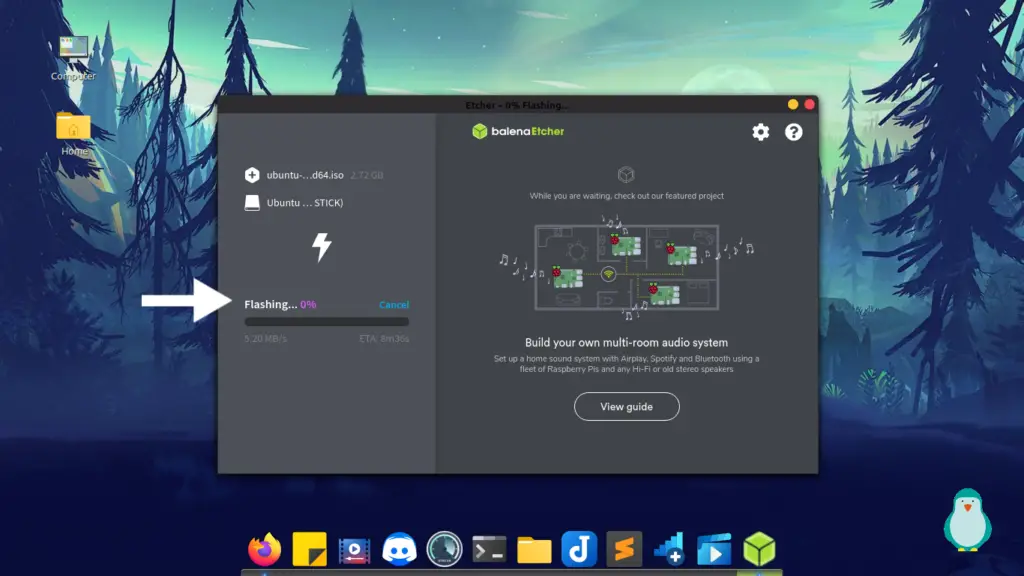
Step-5: Etcher will now start creating your live USb, this usually takes 5-8 minutes to complete but can depend on your system specifications.
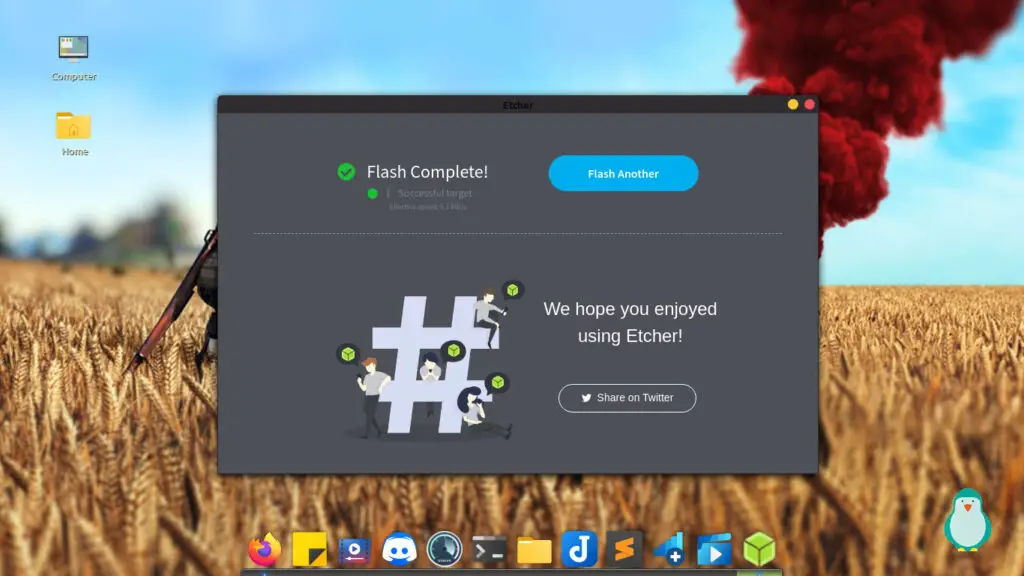
Once it’s done creating the live USB, it will notify you. Now you can boot from the USB.
To boot from your newly created live USB, Restart your computer; keep from F10 or F9 on your keyboard, then select your USB to boot from it.
Also Read: Add applications to cinnamon menu in Linux Mint
Create a Live USB on Linux
Creating a live USB on linux is easy as linux comes with “Live USB creator” tool pre-installed.
This works perfectly with nemo file browser. To install nemo, use
sudo apt install nemo
You can also search for USB image creater in the menu and follow the steps below.
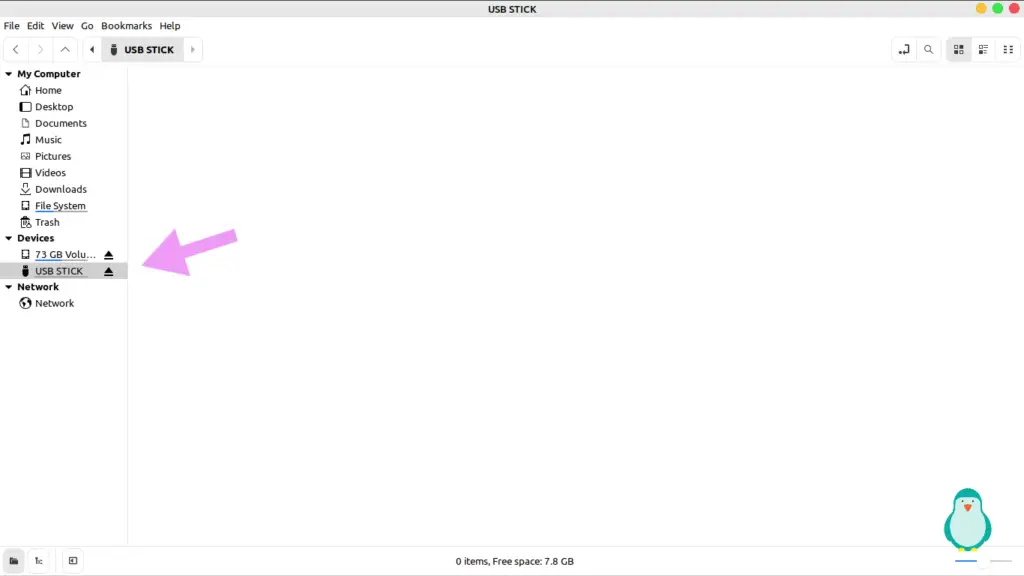
Step-1: Make sure the USB is mounted on your system by clicking on it.
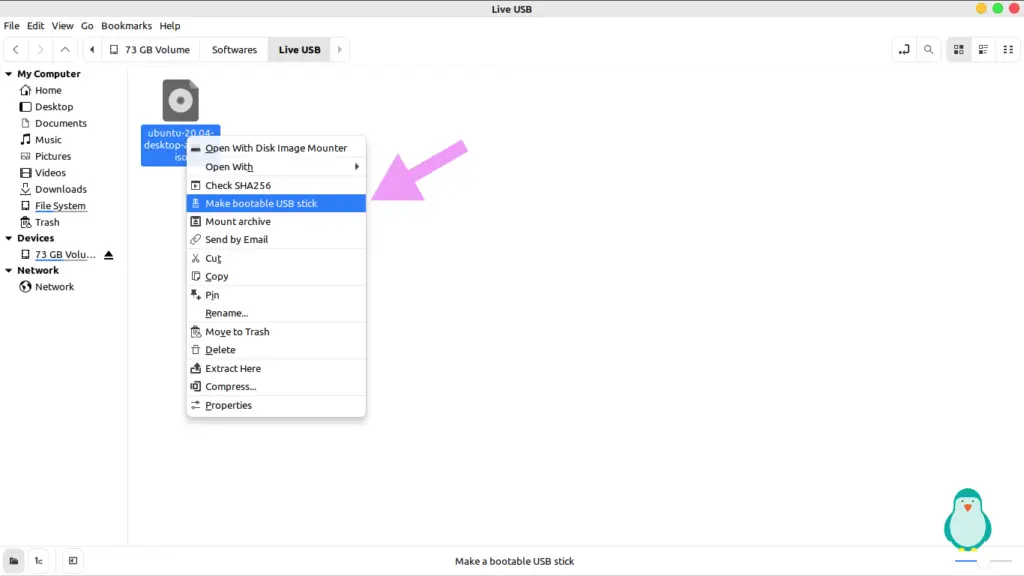
Step-2: Right click on the ISO file that you downloaded and click Make bootable USB stick.
Also Read: How to install Webmin on Linux mint 20
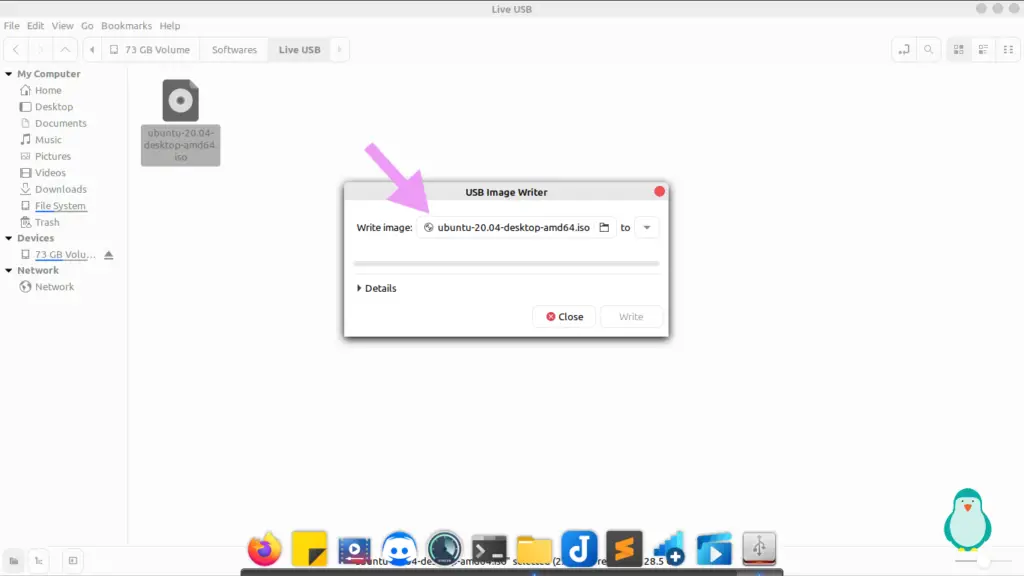
Step-3: The USB Image writer tool has popped up. The disk image is pre-selected, but if you opened it manually via menu, then you need to select the ISO image manually.
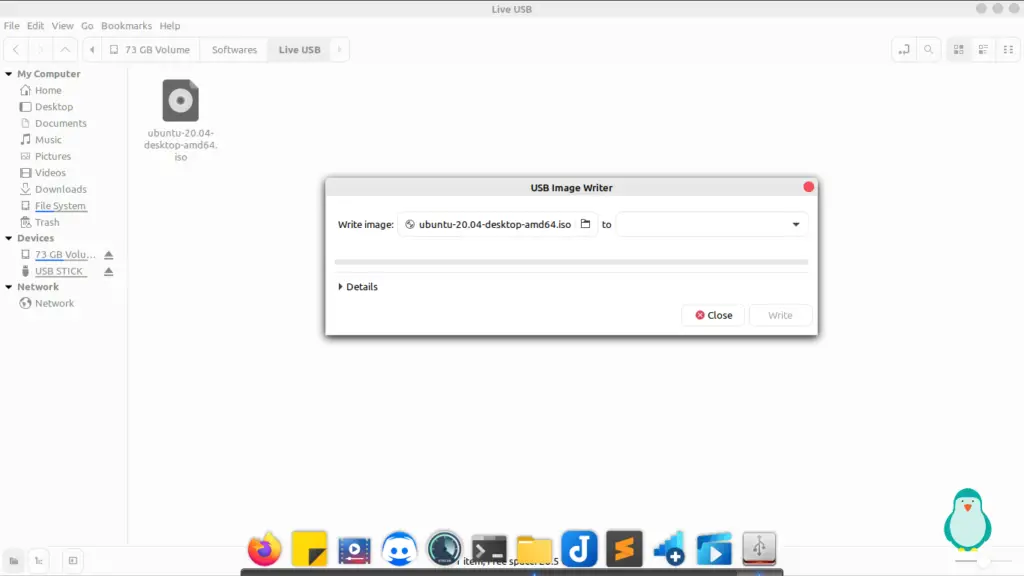
Step-4: Now choose the USb that you want to flash this image onto by clicking on “to” and choosing your USB.
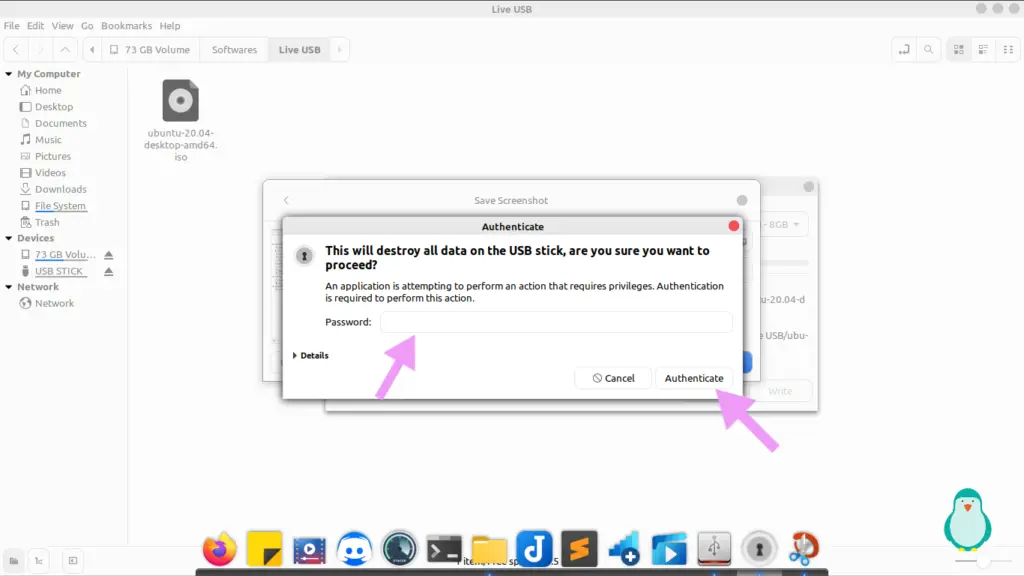
Step-5: Give it required permission by entering your password and click Authenticate.
Also Read: How to Install Tor on Linux Mint 20 and Ubuntu 20.04
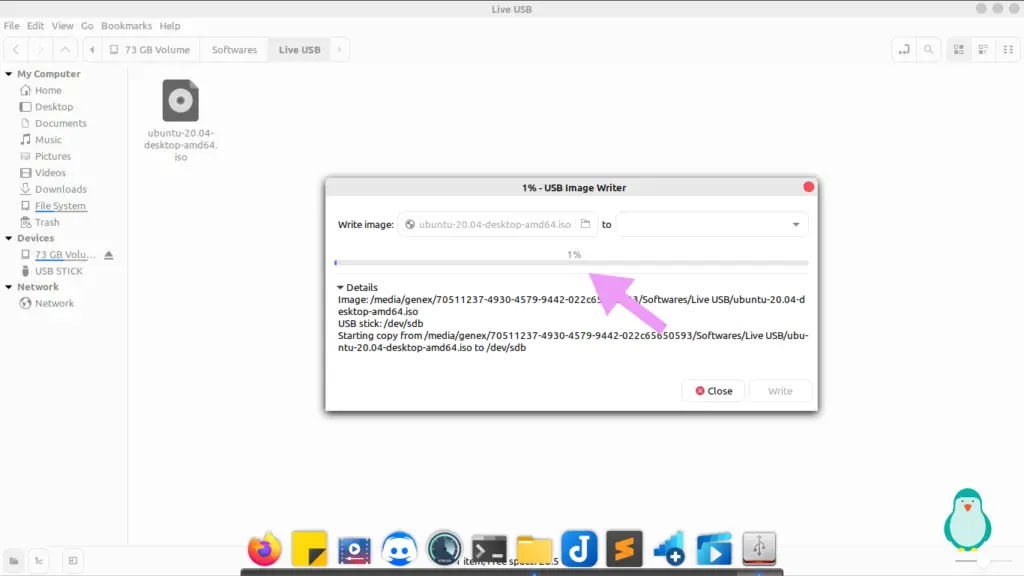
Step-6: It will now start flashing the image on your USB drive. Wait for it to complete. It will take less than 2 minutes for this process to complete.
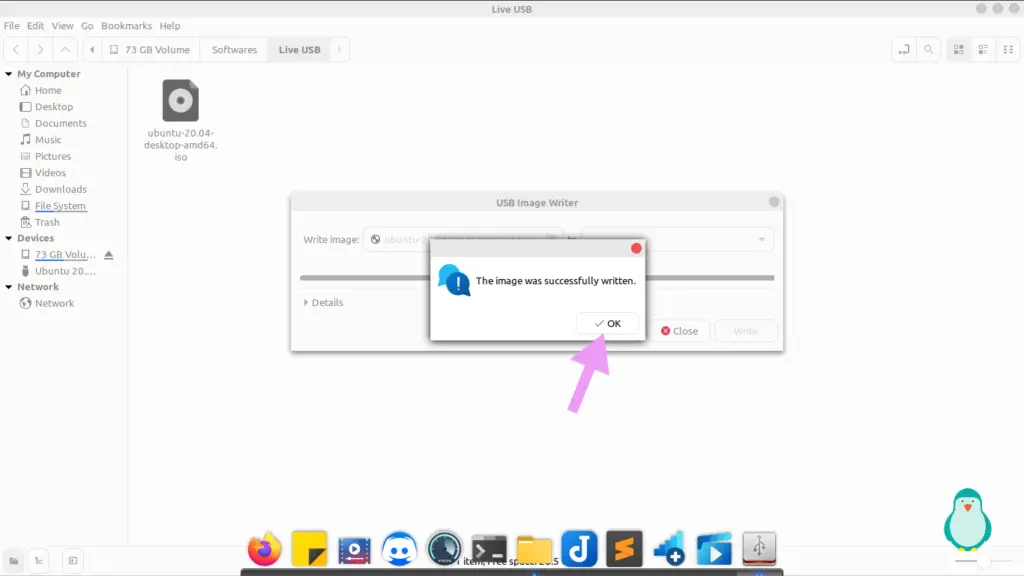
Step-7: Once the image has been written you will receive a message notifying you of process completion. You can now boot from this USB.
To boot from the live USB, check this nice tutorial.
Do note that in both of the methods that I explained above I was using Linux mint. However, the software that I used above (Etcher) works on all platforms, including Mac and Windows.
Also Read: How to Install OpenVPN on Linux mint 20
Etcher provides same functionality and Ui on Windows and Mac as well as Linux.
If you like the look of my desktop then consider subscribing to my blog or bookmarking it because soon I will disclose all the required configuration to make your Linux PC look like the one above in pictures.